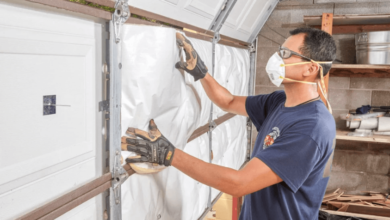
Step-by-Step Guide to Attic Fan Installation

Attic fans are an efficient way to improve the ventilation in your home, helping to reduce heat buildup during the summer and moisture accumulation during the winter. Proper ventilation can extend the life of your roofing materials and improve overall energy efficiency. We will walk you through installing an attic fan, from selecting the right fan to the final installation steps, with the help of an electrician. We will explore each stage in detail, ensuring you have the information to complete this project successfully.
Choosing the Right Attic Fan
Selecting the appropriate attic fan for your home is the first crucial step in the installation process. Attic fans come in various sizes and power ratings, so choosing one that matches your attic’s size and meets your ventilation needs is essential. Factors to consider include the square footage of your attic, the fan’s CFM (cubic feet per minute) rating, and whether you prefer a solar-powered or electrically-powered fan. Solar-powered fans are energy-efficient and more accessible to install since they don’t require electrical wiring, while electric fans offer more power and consistent operation. Consider your area’s climate and your home’s specific needs to make an informed decision.
Read also: Benefits of Choosing Asphalt Shingles for Your Roof Replacement
Preparing for Installation
Once you have chosen the right fan, it’s time to prepare for installation. Gather all necessary tools and materials, including the attic fan kit, a power drill, screws, a saw, a utility knife, and safety gear such as gloves and goggles. Before installing, ensure the power to your attic is turned off to avoid any electrical hazards. Inspect the attic space to determine the optimal location for the fan. It should be installed near the roof’s peak, which can effectively exhaust hot air. Clear any insulation or obstructions from where the fan will be mounted. Mark the location and use a template to outline the cutting area on the roof or gable if the fan kit is provided.
Cutting the Ventilation Opening
With the installation site prepared, the next step is to cut the ventilation opening. Using a saw, carefully cut along the marked lines to create an opening that matches the size of the fan. This step requires precision to ensure the fan fits securely and operates efficiently. After cutting the opening, use a utility knife to trim rough edges and remove debris from the area. If installing on the roof, be cautious and use safety measures to prevent falls or injuries. Once the opening is prepared, position the fan into place and secure it using the screws provided in the kit. Ensure the fan is level and tightly secured to prevent air leaks or movement.
Wiring the Attic Fan
If installing an electrically powered attic fan, the next step involves wiring the fan to your home’s electrical system. Follow the manufacturer’s instructions carefully to connect the wiring safely. Typically, this involves connecting the fan to an existing circuit in the attic or running a new circuit from your home’s electrical panel. Use wire nuts and electrical tape to secure the connections, and ensure all wires are properly insulated. If you are uncomfortable working with electricity, consider hiring a licensed electrician to complete this step. For solar-powered fans, follow the instructions for connecting the solar panel to the fan. Position the solar panel in a location that receives maximum sunlight for optimal performance.
Securing and Testing the Fan
After wiring the fan, it’s time to secure it and test its operation. Double-check all connections and ensure the fan is securely mounted. If the fan includes a thermostat or humidistat, set it to the desired temperature or humidity level. Restore power to the attic and turn on the fan to check its operation. Listen for any unusual noises and ensure the fan is running smoothly. Check for proper airflow by feeling the air being exhausted from the attic. If the fan is not operating correctly, review the installation steps and troubleshooting guide provided by the manufacturer. Once satisfied with the fan’s operation, proceed to the final steps.
Final Steps and Maintenance
The final steps of attic fan installation involve sealing gaps around the fan to prevent air leaks and ensuring the area is clean and debris-free. Use caulk or weatherstripping to seal gaps between the fan and the opening. This will improve the fan’s efficiency and prevent air and water infiltration. Regular maintenance is crucial to keep your attic fan operating effectively. Periodically check the fan for any wear or damage, and clean the blades and vents to remove dust and debris. Ensure the thermostat or humidistat is functioning correctly and make any necessary adjustments. Proper maintenance will extend the life of your attic fan and ensure it continues to provide optimal ventilation.
Installing an attic fan is a practical way to enhance your home’s ventilation and energy efficiency. By carefully selecting the right fan, preparing for installation, cutting the ventilation opening, wiring the fan, securing and testing it, and performing regular maintenance, you can ensure your attic fan operates effectively and efficiently. With your new attic fan, you can enjoy a more comfortable and energy-efficient home environment year-round.


